Sometimes, when designing new images, you want to use part of an existing image but not the whole one. Adobe Illustrator is a powerful vector-creating and editing tool that quickly crops both raster and vector images.
This heavy-duty image creating and editing program for Windows and Mac has many valuable features that make it the industry standard in vector drawing. Among the features is the ability to blur backgrounds or crop only certain parts of the image in Illustrator.
How to Crop in Illustrator
Crop Using the Crop Button

This is one of the easiest ways to crop an image and is ideal for clipping the edges or changing the image’s shape.
– Launch Illustrator and Open or Start a Project
To start cropping your image, you have to launch Adobe Illustrator and either open an existing project by clicking on ‘Open’ or start one by clicking on ‘New’. If you want to crop a vector file, you will first have to embed the image in a new Illustrator file. To do this, start a new project, and then click on ‘File’ in the menu and choose ‘Place’ to add your vector image.
– Select the Image You Want to Crop
To crop an image using the crop button, you have to have something selected first. You can do this by simply clicking on the image you want to crop.
– Select the ‘Crop’ Tool
You will see a’ Crop’ option in the ‘Options’ menu that appears just below the main menu. By clicking on this button, you will be able to crop your selected image.
– Click and Drag the Crop Marks
The crop marks will be on the border of the image. You can click on the sides and drag them into your desired location. Once you drag the crop marks in, it will be shown with a dotted line and the parts outside of the crop marks will go lighter so that you can see your cropped image.
– Click on ‘Apply’
Once you are happy with the chosen cropped image, you can click on ‘Apply’ to make the crop final. However, it is essential to know that once you click on ‘Apply’, the rest of the image will be permanently removed, and there will be no way to see those parts again unless you upload the original image and crop it again.
Crop Using a Clipping Mask
Clip masking is a more accurate way to crop out a specific part of the image you need. This is an ideal tool if the section you need isn’t in a simple square/rectangular shape.
– Launch Illustrator and Open or Start a Project
Launch Adobe Illustrator and open an existing project or start a new one.
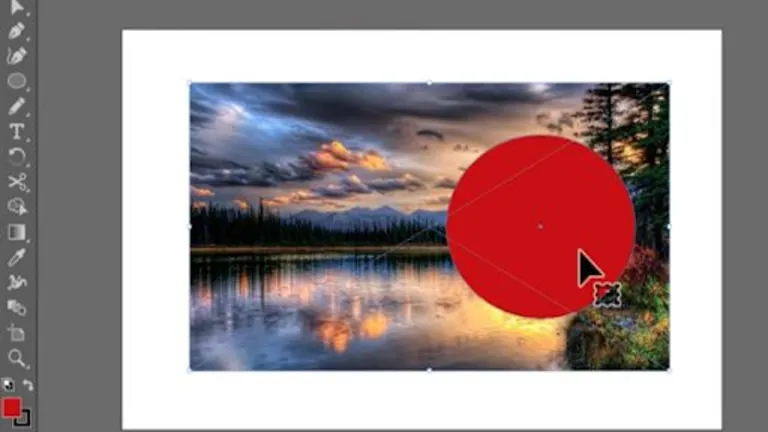
– This is where using a clipping mask gives you more options. You can draw any object over the area you wish to crop. You can use the ‘Ellipse’ tool to draw a circle or use the ‘Rectangle’ tool for a square or rectangle. You can also use the ‘Pen’ tool to draw your own shape, which is ideal for those custom images. You will have to place the shape over the part of the image you want to keep.
– Click on the Selection Tool
Next, you’ll have to use the ‘Selection’ tool, which can be found in the toolbox and is represented by a black arrow.
– Select Everything You Want to Crop
Using the selection tool, drag over the entire image you want to select, including the clipping mask shape.
– Make Your Clipping Mask
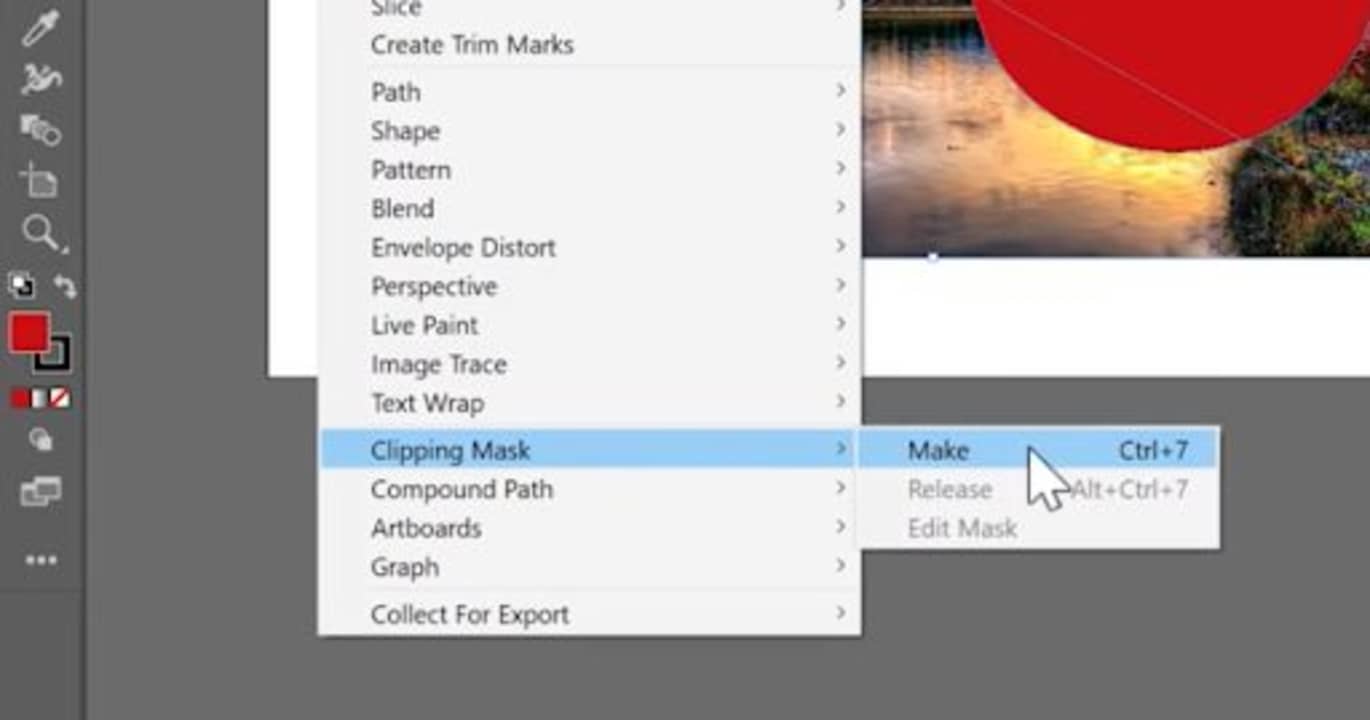
Now, click on ‘Object’ in the top menu. Then, from the drop-down list, choose ‘Clipping Mask’. You will now see a side menu opening; here, you can click on ‘Make’. The clipping mask will now use the top object, i.e. the shape you drew, to crop all objects below.
Use Only What You Need
Cropping in Illustrator is a very useful feature. It enables you to select only specific parts of images for you to use to create a completely new one. Both of these cropping methods are simple enough to do and will work effectively, although a clipping mask gives you more freedom and flexibility.
If you need some more help with the basics of using Adobe Illustrator, why not take a look at our beginner’s guide?